One of the first WordPress plugins I developed more than 10+ years ago was a widget to pull in reviews from Yelp. I called it Yelp Widget Pro. After seeing some moderate success with that plugin, I then developed a very similar plugin called Google Places Reviews. These went untouched for a number of years… until recently.
There were a number of issues with both plugins that needed attention:
- 🧱 Widgets are fading quickly, blocks are the new way to build for WordPress.
- ™️😬 Both names were trademark infringements and WordPress is cracking down on that. So a rebrand was necessary.
- 🧐 The code needed some refactoring for security and developer clarity.
Designing the blocks using the WordPress Figma Design Library
When I design blocks I like to utilize the WordPress Figma Design Library, which is far from complete (at the time of this writing) but provides a decent enough interface for Gutenberg in its current state.

To work with the library:
- Make a copy of the library. You can find the library here. Note: it used to be available in the Figma community but I have not been able to find it lately and finding the link is pretty darn hard.
- Create your own blank project for your actual block or plugin designs.
- Open the “Assets” panel and click the book icon to view the available Team Libraries.
- In the modal, toggle the WordPress Design Library on.
Image Credit: James Koster via WordPress Blog
Now that you have the library enabled, what I like to do is simply copy a blank Gutenberg screen and start designing my block.
First, I start with what the block should look like when first installed. In the case of these plugins, they require API keys to be inserted to start working. Nobody likes API keys, so I wanted to provide a nice welcome introduction to lighten the mood before asking for API keys:
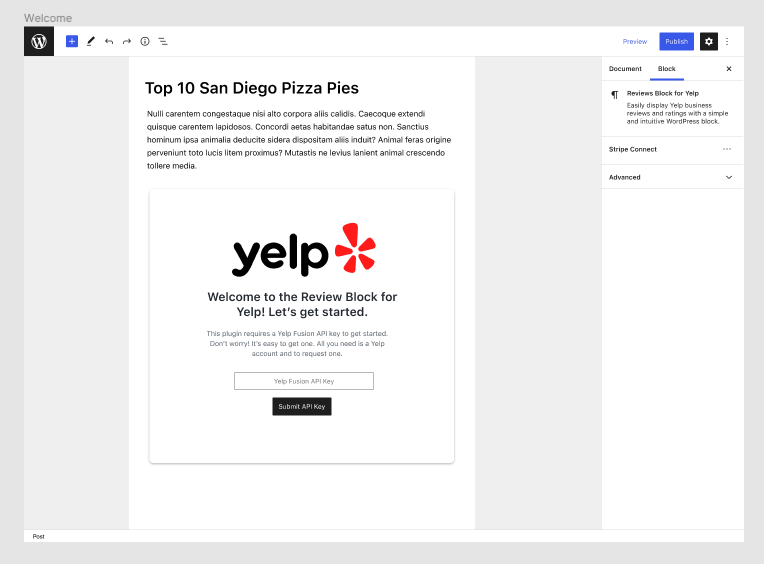
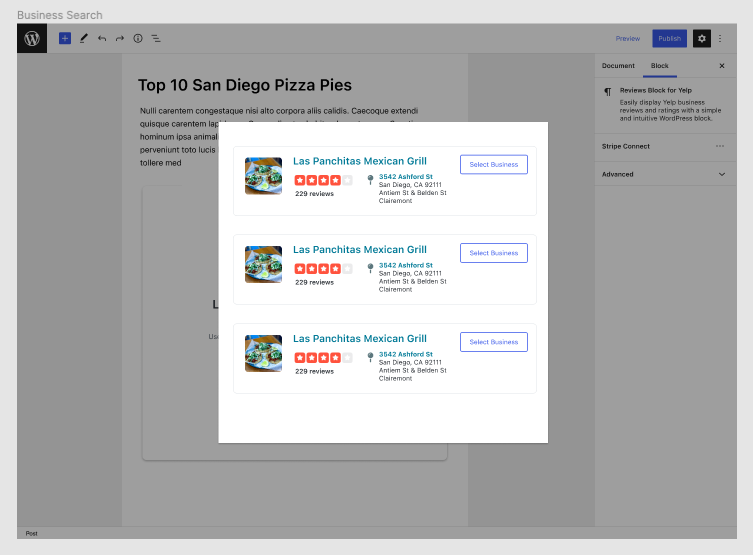
After API keys are entered it’s off to the races. You’re able to search for businesses in order to select the one you’d like to display:
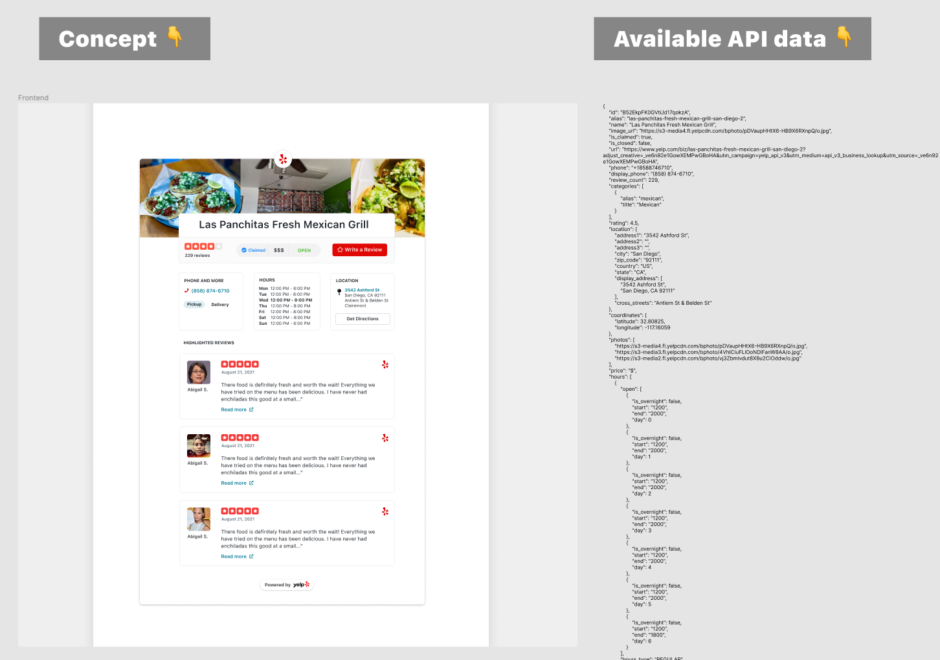
The final screen I designed was what the actual block would look like once the admin has found the business they would like to display. When designing UIs tied to APIs I like to copy all the available API data and place that right next to the design.
Developing the Blocks 🤓
Typically I like to start new block projects using the create block tool that generates a nice boilerplate for get started. However, because these were pre-existing plugins I had to scaffold them myself.
Thankfully this wasn’t too hard. The trickiest part was extending the default Webpack configuration that WordPress scripts uses to account for my additional entry points.
That’s easy enough by adding your own webpack.config.js file to your plugins root directory and extending the default config like so:
/**
 * External Dependencies
 */
const path = require( 'path' );

/**
 * WordPress Dependencies
 */
const defaultConfig = require( '@wordpress/scripts/config/webpack.config.js' );

module.exports = {
	...defaultConfig,
	...{
		entry: {
			"yelp-widget-admin": path.resolve( process.cwd(), 'assets/js', 'admin-main.js' ),
			"yelp-widget-admin-styles": path.resolve( process.cwd(), 'assets/css', 'admin-main.scss' ),
			"yelp-widget-public-styles": path.resolve( process.cwd(), 'assets/css', 'public-main.scss' ),
			"yelp-block": path.resolve( process.cwd(), 'src/block', 'index.js' ),
		},
	}
}
This article by Alex Standiford really helped me understand how this all works:
📚Make Webpack Configuration Easy With wordpress/scripts
I highly recommend giving it a read. I fumbled around with Laravel Mix for a bit before finally giving up and going with wordpress/scripts.
Styling in a Gutenberg World 🎨
One of my biggest frustrations with building solutions for WordPress is that it’s extremely hard to control the look across the thousands of themes available.
Themes like to mess with the look of the frontend. Most commonly, themes cause changes in font family, margin, padding, line-heights, box-shadows, and more.
Some themes just go wild with their CSS and take your plugin down with it. This can lead your users to not have the user experience you wanted. Some may even leave negative reviews.
To combat this issue I’ve tried a variety of methods:
- iFrames
- Shadow DOM
- CSS-in-JS
- Aggressive styling
For these blocks I opted to go with #4 because if little things like the font-family changes, it could actually match their theme better. People also dislike 1-3 for a variety of reasons.
What I did was simply provide a unique ID to the root element of the block and then target child elements from there. This allows me to have highly weighted CSS specificity while avoiding using !important declarations and still providing CSS control to more savvy site owners.
Releasing the Blocks 🚀
To release plugins I use a slight variation to 10up’s GitHub Actions WordPress.org Plugin Deploy. This will save you a lot of time in the long run so if you’re not using it yet, check it out.
I really wanted these blocks to show up in the WordPress.org Block Directory but unfortunately they contain too much PHP.
This is because both plugins maintain backwards compatibility.
Combined, there’s a total of almost 10,000+ active installs. Many of these are businesses that are still happily using the legacy widgets. I didn’t want to take that away from them.
I plan on eventually refactoring the PHP so that it passes the Block Directory checker.
Creating the WordPress.org Image Assets
Both plugins required new images to be designed for both the plugin header and the screenshots. Designing these was fun, but I also needed to rewrite the readme.txt files. Thankfully I had some help on this part (thanks Taylor).
Here’s what the new plugin page looks like for the Yelp block plugin:
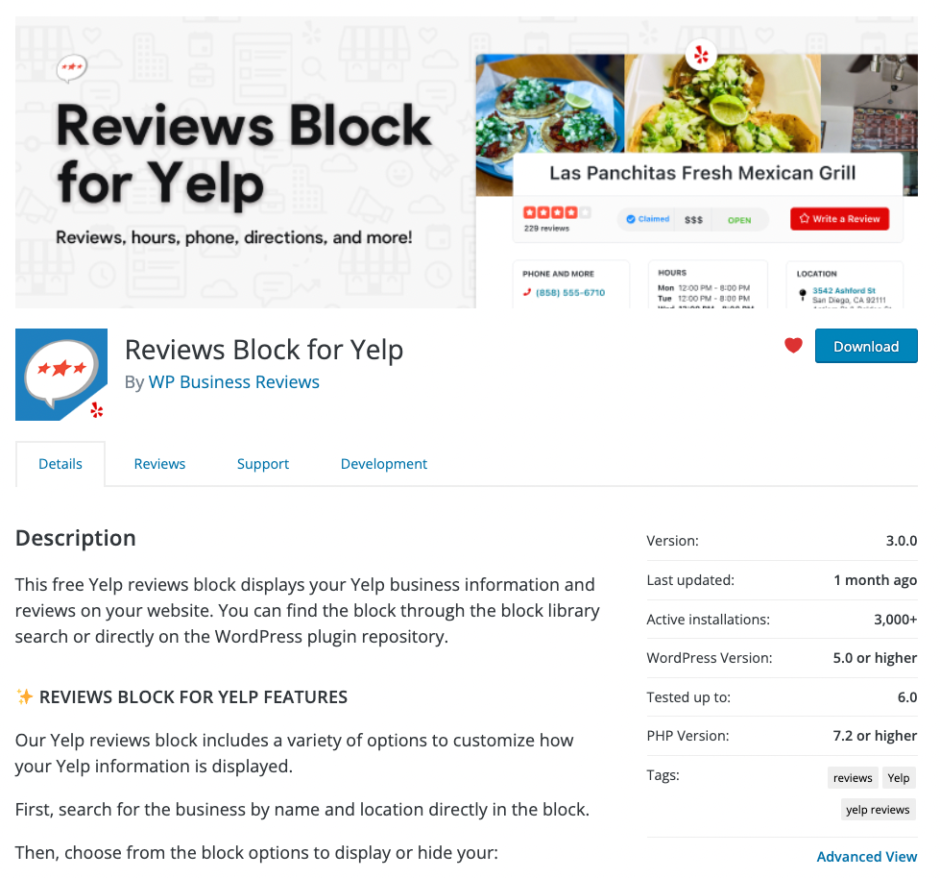
After all that work was done the plugins went live. The entire process from design to release for both plugins took about 2 weeks total. After I finished the first one, I largely forked what I did to create the second. That sped things up considerably.
My goal here is to have folks start using the blocks, like them, and leave 5-star reviews. The second goal is to improve the lead funnel. There are also a few minor upsells for WP Business Reviews.
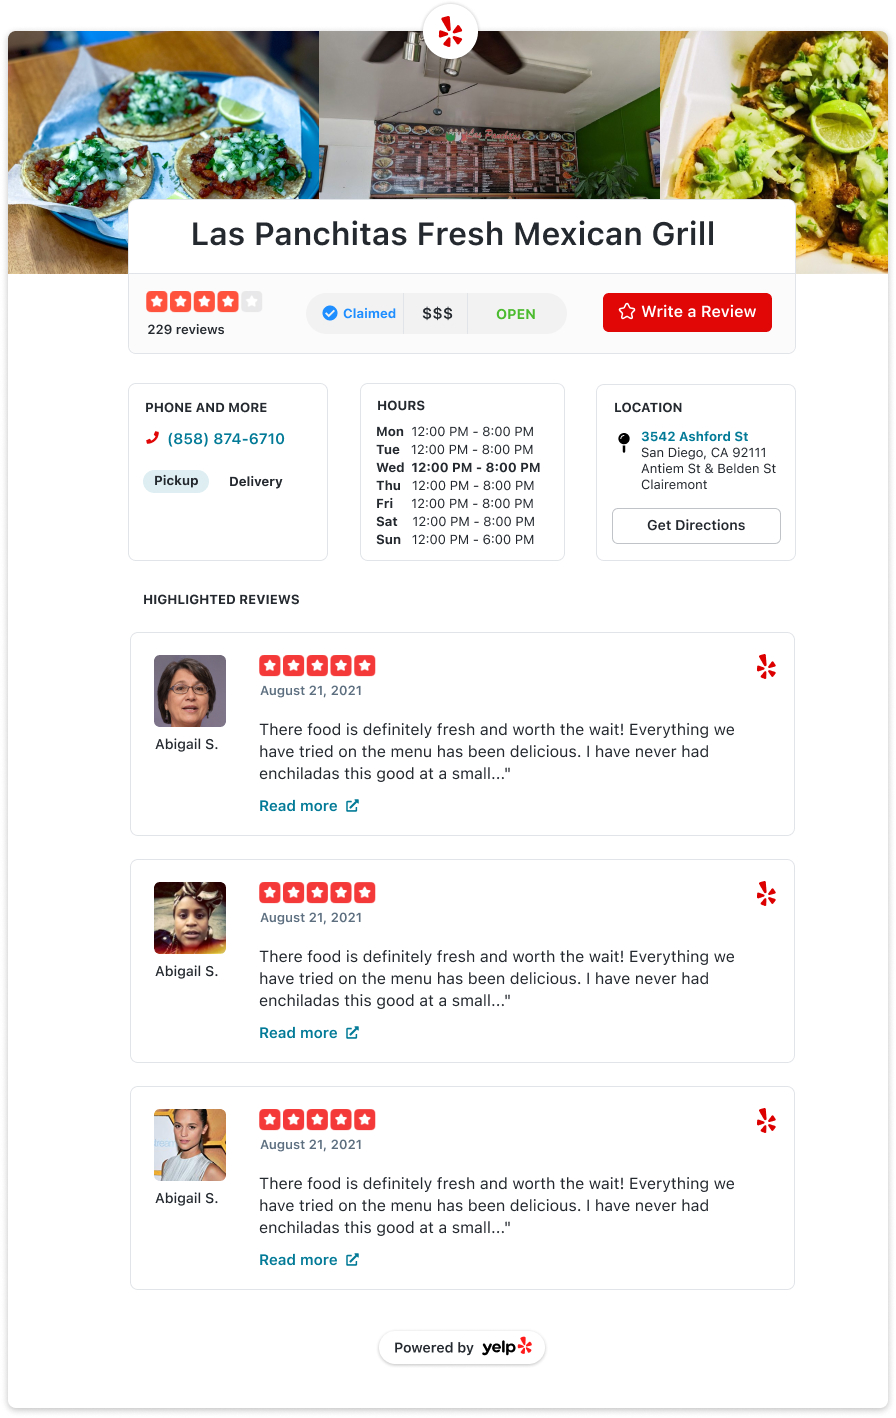
Here is what the Yelp block looks like:
Need to display reviews? Try them out and let me know what you think!
